Let’s be honest, a stunning neckline can make or break your entire outfit. It’s the focal point! But getting that perfect fit and sharp look? That all happens in the cutting and stitching phase. In my experience, this is where most DIY projects go sideways, but don’t worry—I’ve got some pro tips.
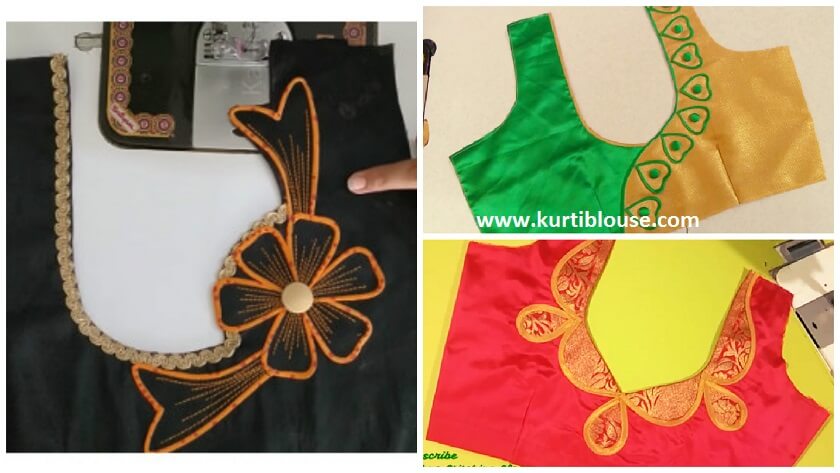
First, Master the Pattern.
Never, and I mean never, cut directly into your main fabric based on a rough pin. I remember a client who did this on a beautiful silk, and the neckline stretched irreparably. Always:
Create a Mock-Up: Trace your design onto paper or cheap muslin first.
Test the Fit: Pin the paper pattern to your mannequin or yourself. Check for symmetry and comfort—can you move your head?
Refine: Make all your adjustments on this mock-up. It’s your blueprint for success.
Stitching for a Flawless Finish.
The secret to a professional look is all in the finish.
Stabilize the Edge: Before you even think about stitching, apply a thin fusible stay tape along the neckline’s curve. This prevents stretching during sewing and wear.
The Power of Understitching: This is my golden rule! After attaching the lining, stitch the seam allowance to the lining itself. This keeps the lining from peeking out and makes the neckline lie perfectly flat.
Blouse Neck Designs Cutting and Stitching – Video Tutorial

ब्लाउज नेक डिजाइन (काटना और सिलाई) – ट्यूटोरियल
Read More:
- New Saree Blouse Back Neck Designs
- Simple Pattu & Silk Saree Kuchu Design
- 15+ Traditional Blouse Designs Patterns
- Fancy Baby Frock Designs Pattern
- How To Wear Border Saree Perfectly
Leave a Reply