Making of colorful peacock feather from aari work
Aari work, with its intricate chain stitch embroidery, is perfect for creating something as detailed as a peacock feather. I find the process almost meditative! The key is to build the feather in layers.
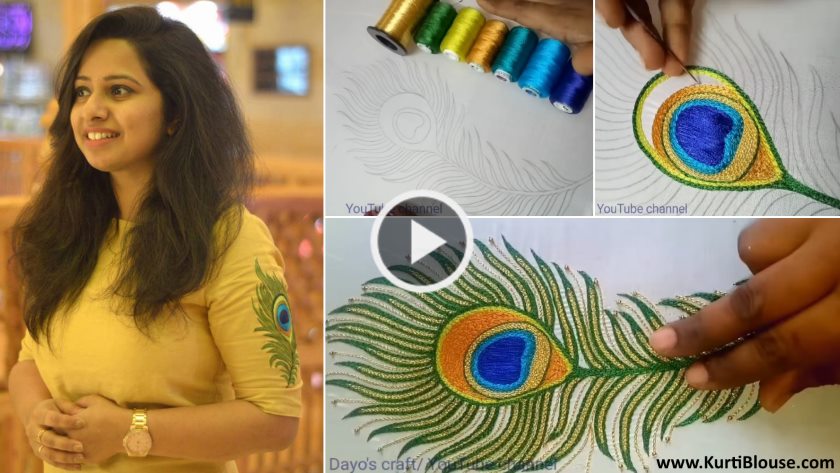
Here’s a simplified breakdown:
Trace the Design: First, trace the elegant outline of the feather and its central shaft (vanes) onto your fabric. Tightly stretch the fabric on a hoop.
Stitch the Shaft: Using a thick thread or zardozi, work the central shaft with a solid filling stitch. This is your anchor point.
Create the “Eye”: This is the most fun part! Using a tapestry needle, carefully place the sequin or nakshi for the iconic eye of the feather. Secure it in place with tiny aari stitches around the perimeter, then fill the center with a contrasting colored bead.
Embroider the Vanes: Now, using fine, colorful threads, work the hair-like strands of the vane. Work from the shaft outward, using short, straight chain stitches. The magic is in blending colors—using shades of blue, green, and gold together—to create that iridescent, lifelike effect.
The result is a stunning, textured piece of art that adds a royal touch to any garment.
Different types of kurtis designs

Read More
- 18 Kurti Designs that will look good on any girl
- Stylish Kurti Neck Design Cutting and Stitching
- 20 Types Of Kurtis You Can Have In Your Wardrobe
- Piping Latkan Neck Design For Dresses
- Piping Dori Hole Back Neck Design Cutting and Stitching
Leave a Reply